
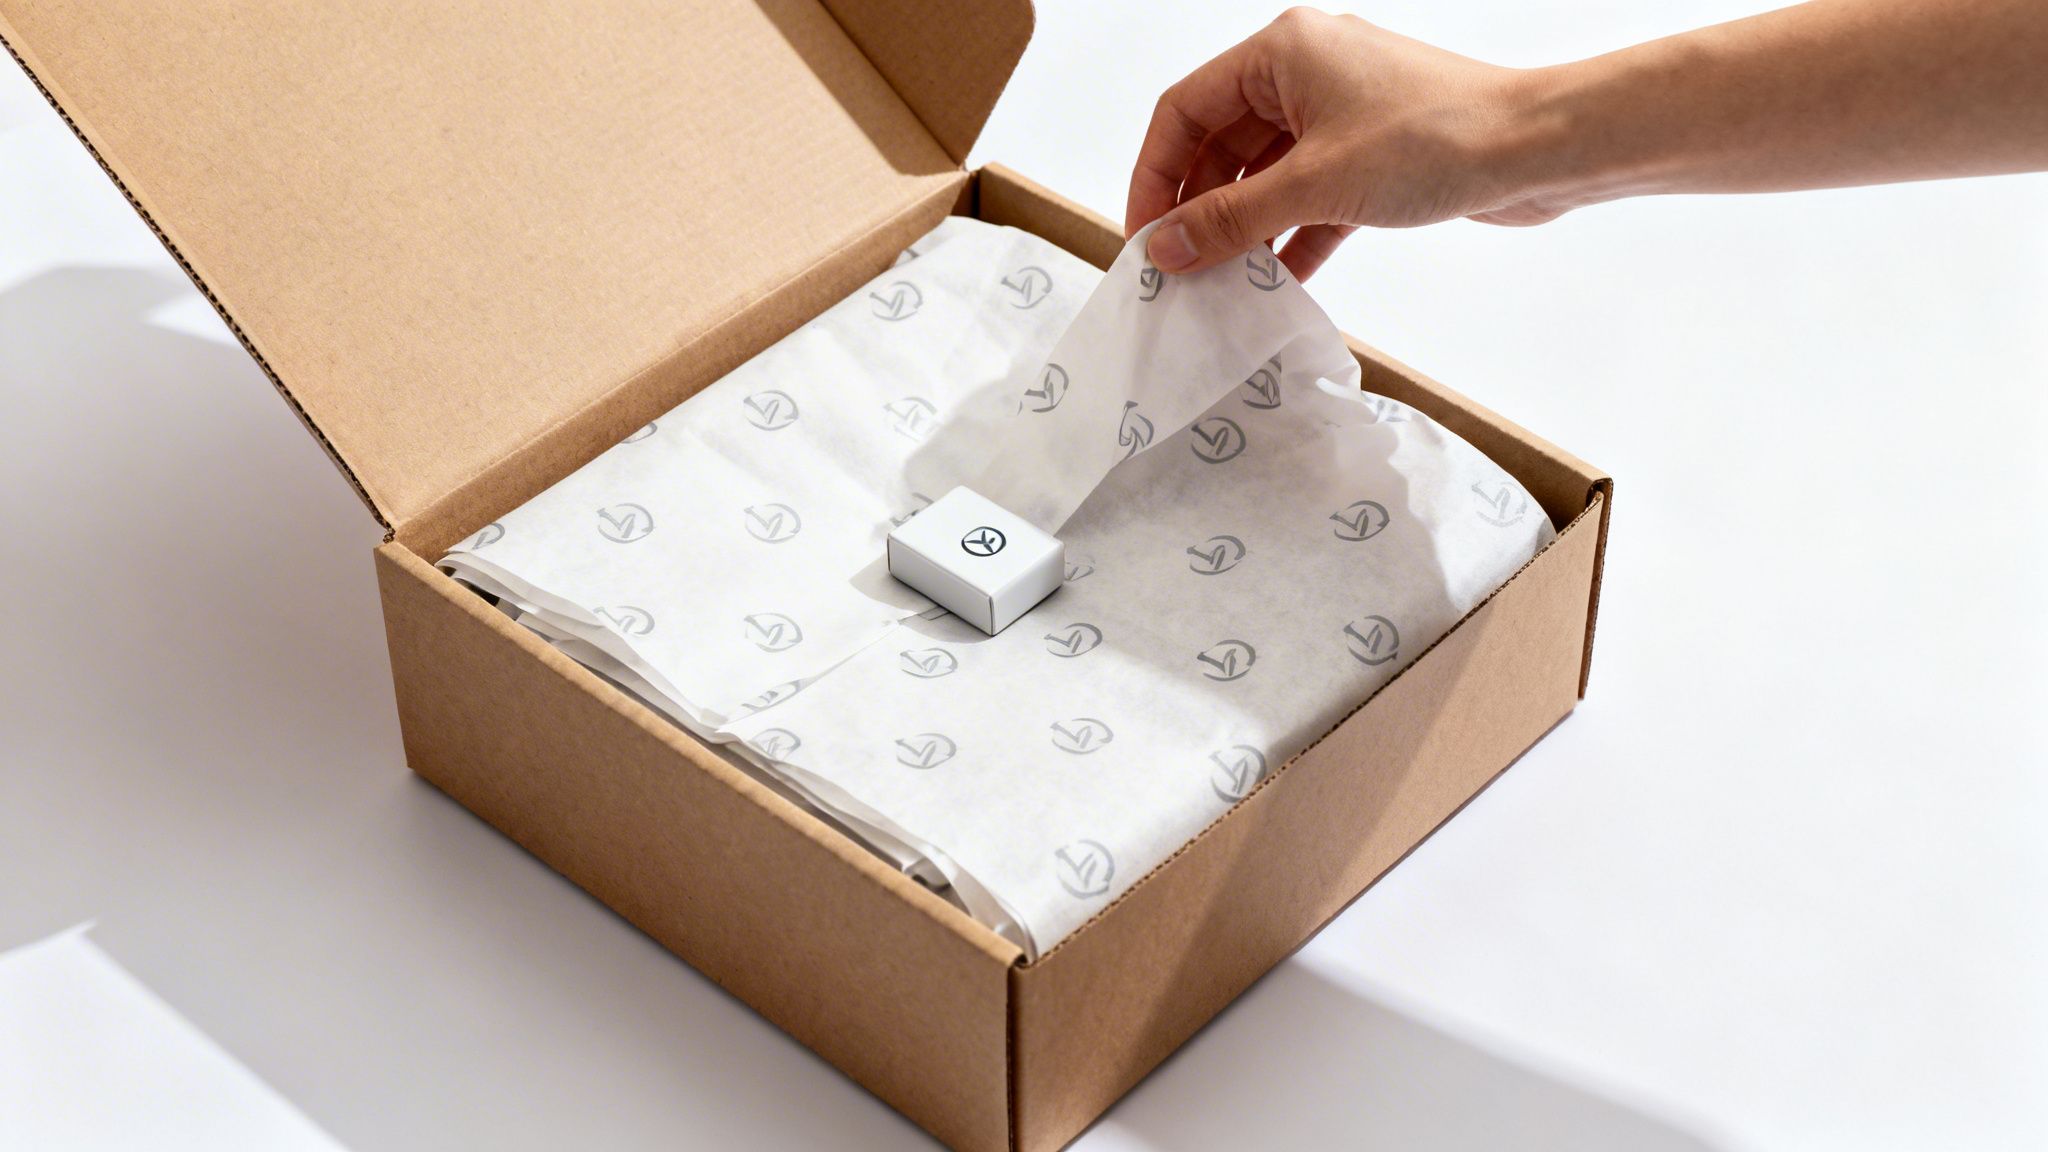
That rustle. That reveal. Before your customer even sees their purchase, they feel it—a delicate, custom-printed paper whispering quality. This isn't just filler; it's the first physical handshake your brand offers. Printed tissue paper transforms a simple delivery into a memorable unboxing experience, turning a moment of transaction into a moment of connection. Ready to make every first impression count?
Why Printed Tissue Paper Is Your Secret Branding Weapon
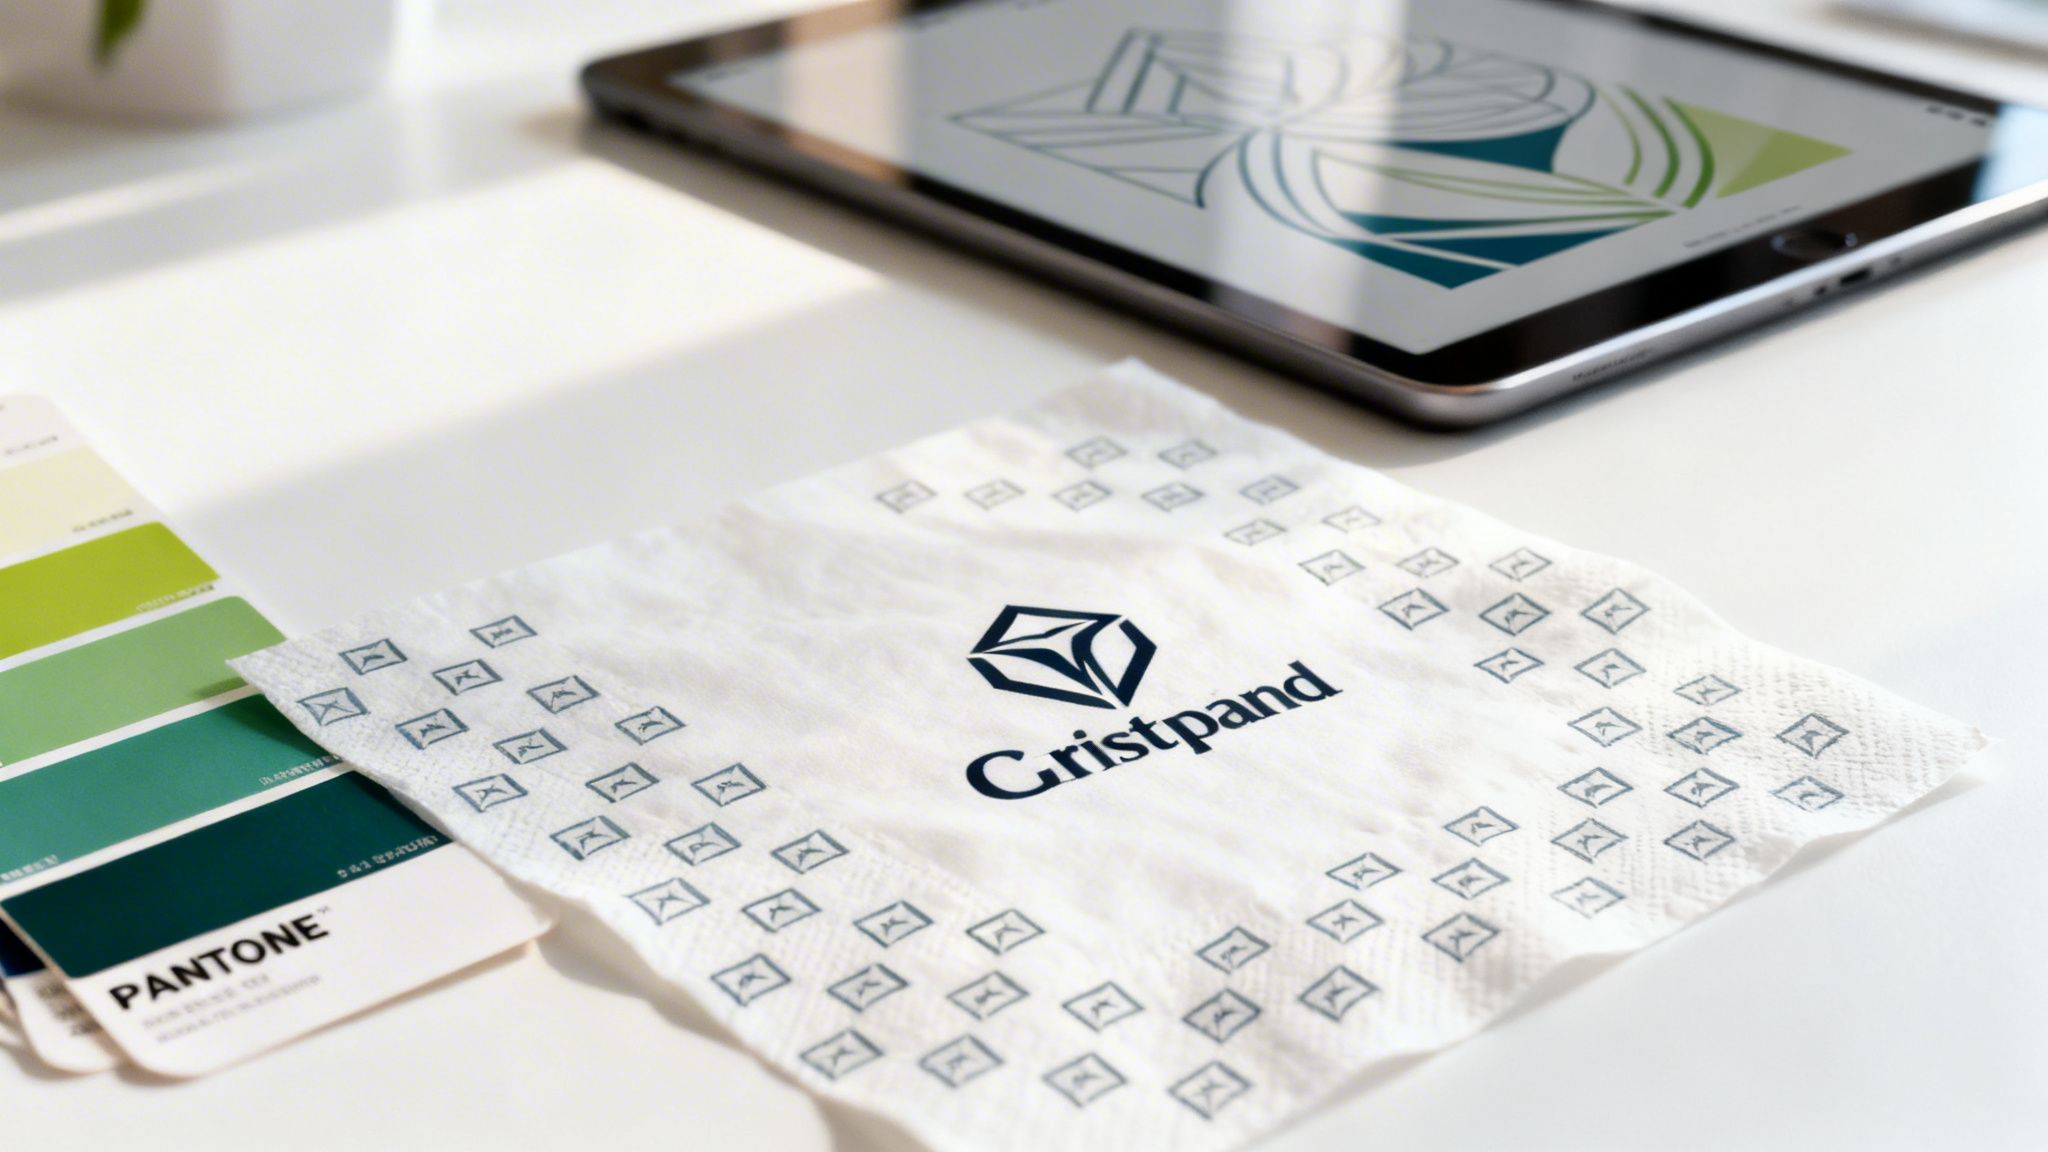
In a crowded market, small, thoughtful touches make a brand unforgettable. Custom printed tissue paper elevates your packaging from a functional necessity to a genuine brand experience. It’s the very first physical thing a customer interacts with when they open their parcel, immediately setting the tone for what’s inside and reinforcing your brand identity with a subtle message of quality and care.
Think of it as more than just a protective layer; it's a miniature billboard right inside the box. Here’s why it’s so effective:
- First Impression: It creates an immediate sense of luxury and attention to detail.
- Brand Reinforcement: It ensures your logo and brand colours get extra visibility.
- Cohesive Experience: It bridges the gap between your online store and the physical product.
Building Brand Recognition Affordably
Smart businesses are constantly seeking affordable ways to stand out, and branded materials are key. The custom tissue paper market is booming—in Europe, it's already a USD 178.7 million industry, with the UK poised for major growth. Small and medium-sized businesses are leading this charge, recognizing it as a high-impact, cost-effective packaging solution. You can find more data on the tissue paper market's growth over at imarcgroup.com.
When you invest in custom tissue paper, you're buying more than just packaging; you're buying a feeling. It’s that feeling of opening something special, something put together with genuine thought. That’s a powerful way to build customer loyalty and encourage repeat business.
To fully leverage branding, it’s worth exploring the broader world of merchandising in fashion, where packaging is a critical part of the story. For other packaging ideas, our guide on creating impactful gift bags with a logo is a great place to start. Now, let's walk through exactly how to design and order the perfect printed tissue paper for your brand.
Step 1: Choosing the Right Paper Material and Weight
Getting the foundation right is everything. The material you choose sets the stage for the entire unboxing experience, influencing the feel, the sound, and the message your packaging sends.
The two main players you'll come across are MF (Machine Finished) and MG (Machine Glazed).
- MF tissue paper is your classic, dependable option—smooth and crisp on both sides for a consistently premium feel.
- MG tissue paper has a slight gloss on one side and a more natural, matte finish on the other, which can make colours pop.
Decoding Paper Weight (GSM)
Your most important decision is the paper's weight, measured in GSM (grams per square metre). GSM dictates the paper's thickness and durability, directly shaping how luxurious it feels.
- 17 GSM: This is the go-to for many luxury brands. It's lightweight, incredibly soft, and drapes beautifully around smaller items like jewellery or delicate accessories, adding a real touch of elegance.
- 28-30 GSM: Need something more robust? This weight is sturdier and more resistant to tearing. It's a fantastic choice for wrapping heavier goods like books, candles, or premium corporate gifts.
Getting the GSM right means your tissue paper doesn't just look the part—it does its job, protecting your product all the way to its new home.
This infographic captures why this small investment is such a smart move.
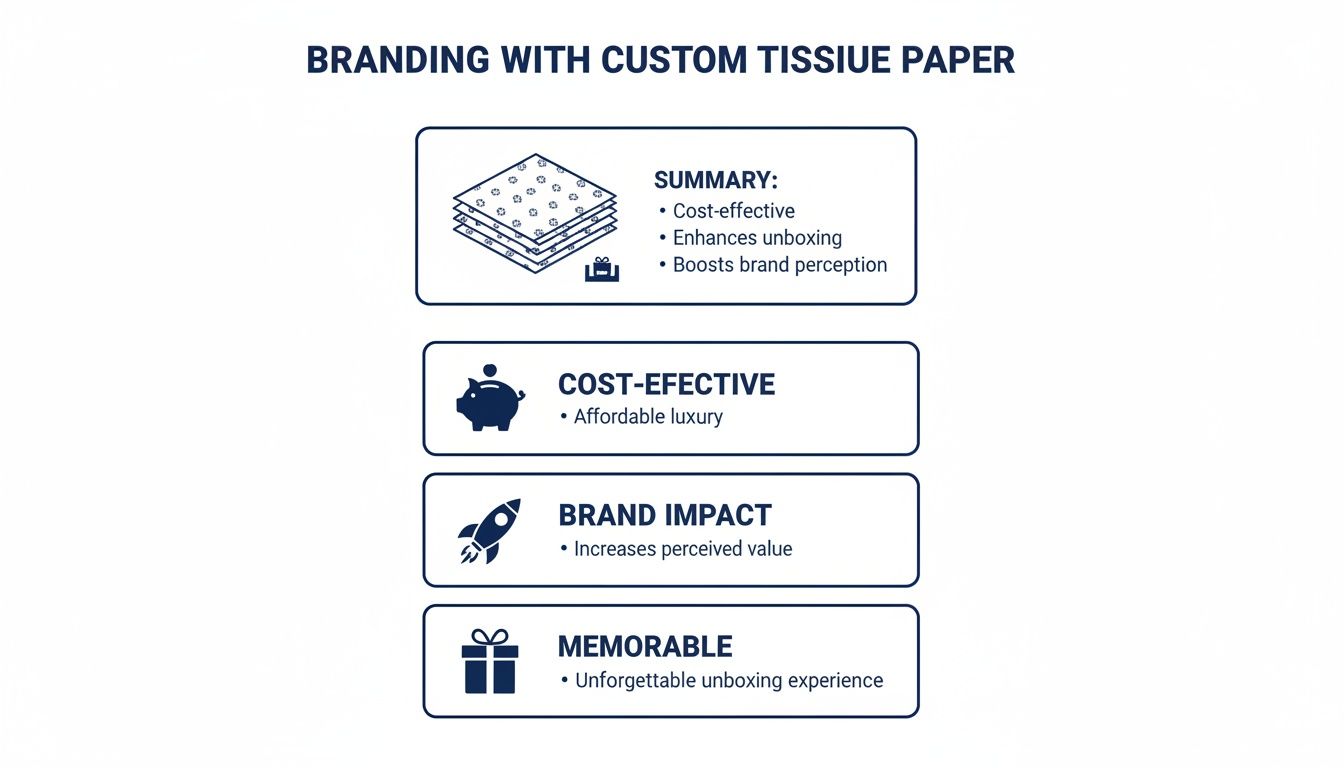
As you can see, it’s about creating a memorable moment for your customer in a way that's surprisingly cost-effective.
To help you visualise the options, here's a quick guide.
Tissue Paper Material and Weight Guide
| Paper Type | Typical GSM Range | Key Characteristics | Best For |
|---|---|---|---|
| MF (Machine Finished) | 17–22 GSM | Smooth, crisp texture on both sides; classic feel. | Luxury goods, apparel, jewellery, delicate items. |
| MG (Machine Glazed) | 17–30 GSM | Glossy on one side, matte on the other; makes colours vibrant. | Retail packaging, gift bags, adding a subtle sheen. |
| Recycled Kraft | 18–30 GSM | Natural, rustic look; slightly rougher texture. | Eco-conscious brands, handmade goods, organic products. |
| Acid-Free | 17–28 GSM | Archival quality; prevents yellowing and degradation. | Fine art, textiles, photography, long-term storage. |
Choosing the right combination ensures your packaging not only protects your products but also perfectly reflects your brand’s personality.
Emphasising Sustainability and Speciality Papers
For today's brands, sustainability isn't just a buzzword; it's a core value. Your packaging is a tangible way to show customers you care.
- Look for materials like FSC-certified paper, which guarantees it's sourced from responsibly managed forests.
- Papers with high recycled content are also a brilliant choice.
- To learn more about integrating green practices, check our guide on eco-friendly promotional products.
Your choice of paper sends a message. Opting for a recycled or FSC-certified stock demonstrates a commitment to sustainability that environmentally-conscious customers will appreciate and remember.
For specialised needs, like preserving delicate textiles or prints, using acid-free tissue paper is non-negotiable. It prevents discolouration and damage over time—a small detail that makes a huge difference.
Step 2: Bringing Your Artwork to Life with the Right Printing Method
You’ve picked the perfect paper. Now for the exciting part: turning your digital design into something your customers can hold. The right printing method depends on your design complexity, order quantity, and timeline. The choice boils down to digital printing versus flexographic printing.
- Digital Printing: The agile specialist. It's brilliant for smaller orders, designs with a full spectrum of colours, or when you’re in a hurry. Perfect for a limited run or a detailed, photographic image.
- Flexographic (Flexo) Printing: The powerful workhorse. This method uses flexible printing plates and is the go-to for larger runs, especially for simpler designs with one or two specific brand colours. While there's an initial setup cost, the price per sheet drops dramatically as the quantity goes up.
The Powerhouse of Flexographic Printing
When it comes to printing at scale, nothing beats the reliability of flexo. To give you some perspective, toilet paper holds a massive 25.57% revenue share of the entire European printed tissue paper market. While simple, it perfectly illustrates the incredible volume and consistency that flexography delivers. This is the same proven technology that ensures your brand’s logo is printed crisply across thousands of sheets. You can find more insights on the European tissue paper market over at grandviewresearch.com.
Pro Tip: If your brand identity is built on an exact Pantone colour, flexo printing is almost always the better choice. It uses pre-mixed Pantone inks, which guarantees a perfect colour match across the entire print run.
Preparing Your Artwork for a Flawless Print
Getting your artwork right from the start is the secret to a perfect result. Here are a few non-negotiable tips:
- Always Use Vector Files: For logos and line art, your artwork must be in a vector format (.ai, .eps, .svg). Vectors can be scaled infinitely without losing sharpness.
- Create a Seamless Pattern: Your design needs to repeat flawlessly. Double-check that the edges of your design tile perfectly without any weird gaps or overlaps.
- Outline All Your Fonts: Before saving, convert all text to outlines (or 'curves'). This turns the text into a vector shape, so the printer doesn’t need your specific font installed.
To dig a little deeper, have a look at our guide comparing offset printing vs digital printing for more detail.
Step 3: Placing Your Order and Approving Proofs
You’re ready to place your order. The first things to nail down with your supplier are the Minimum Order Quantities (MOQs) and production lead times, as these will have the biggest impact on your budget and timeline.
MOQs differ wildly between digital (great for smaller runs) and flexo printing (economical for large orders). Understanding this is key to managing your budget. For more cost-saving tips, our guide on getting discounts on promotional products has some great ideas. Production lead times are just as critical, so be sure to build them into your schedule.
The All-Important Sample Approval Checklist
The proofing stage is your safety net. Rushing this step is a recipe for disappointment. Whether you’re looking at a digital PDF or a physical sample, use this checklist:
- Colour Accuracy: Does the colour match your brand guidelines? If you specified a Pantone (PMS) shade, check it carefully.
- Print Clarity: Is your logo and any text sharp? Look for fuzziness or misalignment where colours meet.
- Pattern Alignment: Does the design repeat seamlessly without strange gaps or overlaps?
- Paper Feel: For a physical sample, does the weight (GSM) and finish feel right? Does it have that premium touch you wanted?
A digital proof is fantastic for a quick check of the layout and to spot any typos. But to be 100% certain about colour and paper quality, nothing beats having a physical sample in your hands. It might add a few days to the process, but the peace of mind is worth it.
Ever wonder how suppliers handle huge orders? Major players like supermarkets and hypermarkets control a staggering 45% of all tissue distribution channels. This industrial efficiency is what makes it possible to get thousands of sheets printed and delivered for large-scale campaigns. You can read more about the tissue paper market's distribution channels over at imarcgroup.com.
Getting Creative with Your Printed Tissue Paper
You've got your custom-printed tissue paper, now what? Don't just think of it as box filler. This material is a secret weapon for creating memorable brand moments.
The Unboxing Reveal
For any e-commerce brand, the unboxing experience is your first physical handshake. As they open the parcel, your beautifully branded paper builds excitement and communicates quality before they even reach the product. You’re not just sending an item; you’re delivering an event.
Elevating Gifting and In-Store Moments
- Premium Gift Wrap: Use it for employee welcome kits or client thank-you gifts to add a layer of sophistication. It’s a small detail that makes the recipient feel genuinely appreciated. For more inspiration, check our guide to the best swag ideas.
- Boutique Checkout Experience: In a physical store, wrapping a purchase in custom tissue reinforces your brand identity one final time, making the sale feel personal and luxurious.
Your tissue paper is often the final touchpoint in a customer's journey. Using it creatively ensures that the final impression is one of quality, care, and cohesive branding, which is essential for building loyalty.
Beyond the Box: Functional and Event-Ready
Printed tissue paper can also be an event essential. At trade shows, use it to wrap giveaways and samples for a slick, unified look. Interestingly, the fastest-growing segment in Europe’s printed tissue market is napkins. This points to a huge opportunity for businesses to use branded tissue not just for packaging but as functional items that get your brand seen.
Your Questions Answered: Printed Tissue Paper FAQ
A few questions might still be lingering. Let's tackle the most common queries so you can move forward with total confidence.
What’s the Best Eco-Friendly Option for Printed Tissue Paper?
Look for FSC-certified paper from responsibly managed forests. Ask for options with high post-consumer recycled content and pair it with water-based or soy-based inks, which have a much lower environmental impact. Many suppliers now offer tissue paper that is fully recyclable and even home-compostable.
How Do I Create a Good Repeating Pattern for My Logo?
A good pattern feels balanced and professional. Always start with a high-resolution vector file of your logo (.ai, .eps, or .svg). From there, you have two classic approaches:
- Step-and-Repeat: A clean, structured grid for a sophisticated, corporate feel.
- Tossed Pattern: A more dynamic, informal layout where the logo is scattered, great for playful brands.
The secret is giving the logos room to breathe. Negative space makes a design feel premium, not cluttered.
Can I Print a Full-Colour Photograph on Tissue Paper?
Absolutely. For a photo or any image with complex colour gradients, digital printing is the only way to go. It uses a CMYK process to replicate a huge spectrum of colours. Just remember that the thin, translucent nature of tissue paper will give the photo a softer, more artistic quality. This is why getting a physical sample is non-negotiable to see how your image translates onto the material.
The biggest and most costly mistake is rushing the proofing process. Scrutinise every detail on your digital or physical proof. Check the spelling, logo placement, pattern layout, and any Pantone (PMS) colour codes. A pre-production sample is your ultimate insurance policy.
Ready to Elevate Your Brand Experience?
Printed tissue paper is more than just packaging—it's a powerful tool for building brand recognition and creating a lasting positive impression. By choosing the right materials, perfecting your design, and using it creatively, you can craft an unboxing experience that delights customers and keeps them coming back.
Ready to create an unforgettable unboxing experience? At Persopens, we specialise in transforming your brand into tangible, high-quality promotional materials, including stunning printed tissue paper. Explore our custom packaging options and get a quote today!


0 commenti