
When you're looking to get your logo printed on ceramic mugs, you'll quickly find there are a few ways to get the job done. For vibrant, full-colour designs, nothing really beats dye sublimation. But if you have a simpler logo and need a large batch, screen printing is often the go-to for its cost-effectiveness. The right choice always comes down to your specific design, how many mugs you need, and how long you want the print to last.
Why Custom Mugs Are Such a Powerful Branding Tool
Think about it – a printed mug is more than just a place to pour your coffee. It's a little piece of your brand that sits on your customer's desk, day in and day out. That kind of daily visibility is hard to beat. Unlike a social media ad that's gone in a flash, a quality mug provides repeated exposure, keeping your business top of mind with every single sip.
The numbers back this up, too. The global market for custom mugs was valued at a staggering USD 28.09 billion and is expected to balloon to USD 58.05 billion by 2032. This isn't just a fleeting trend; it shows a real, sustained demand for personalised items that people can actually use. You can dive deeper into these market trends and what they mean for the Australian market.
Making a Real Connection with Your Audience
A custom mug feels personal. It’s a genuinely useful gift that seamlessly integrates your brand into someone's daily routine, whether at home or in the office.
Imagine a few scenarios:
- Corporate Gifting: A sleek, minimalist mug with your logo subtly placed can reinforce a professional, high-end image for important clients and your own team.
- Cafe Merchandise: An artistic, colourful mug can perfectly capture your cafe's unique vibe, essentially turning your loyal customers into walking billboards.
- Event Giveaways: Handing out a branded mug at a trade show or conference acts as a practical reminder of your business, long after the event wraps up.
A thoughtfully designed mug doesn't just display a logo; it communicates your brand's commitment to quality and attention to detail. It's one of the few marketing tools people will actually welcome into their homes.
Starting with the Right Choice
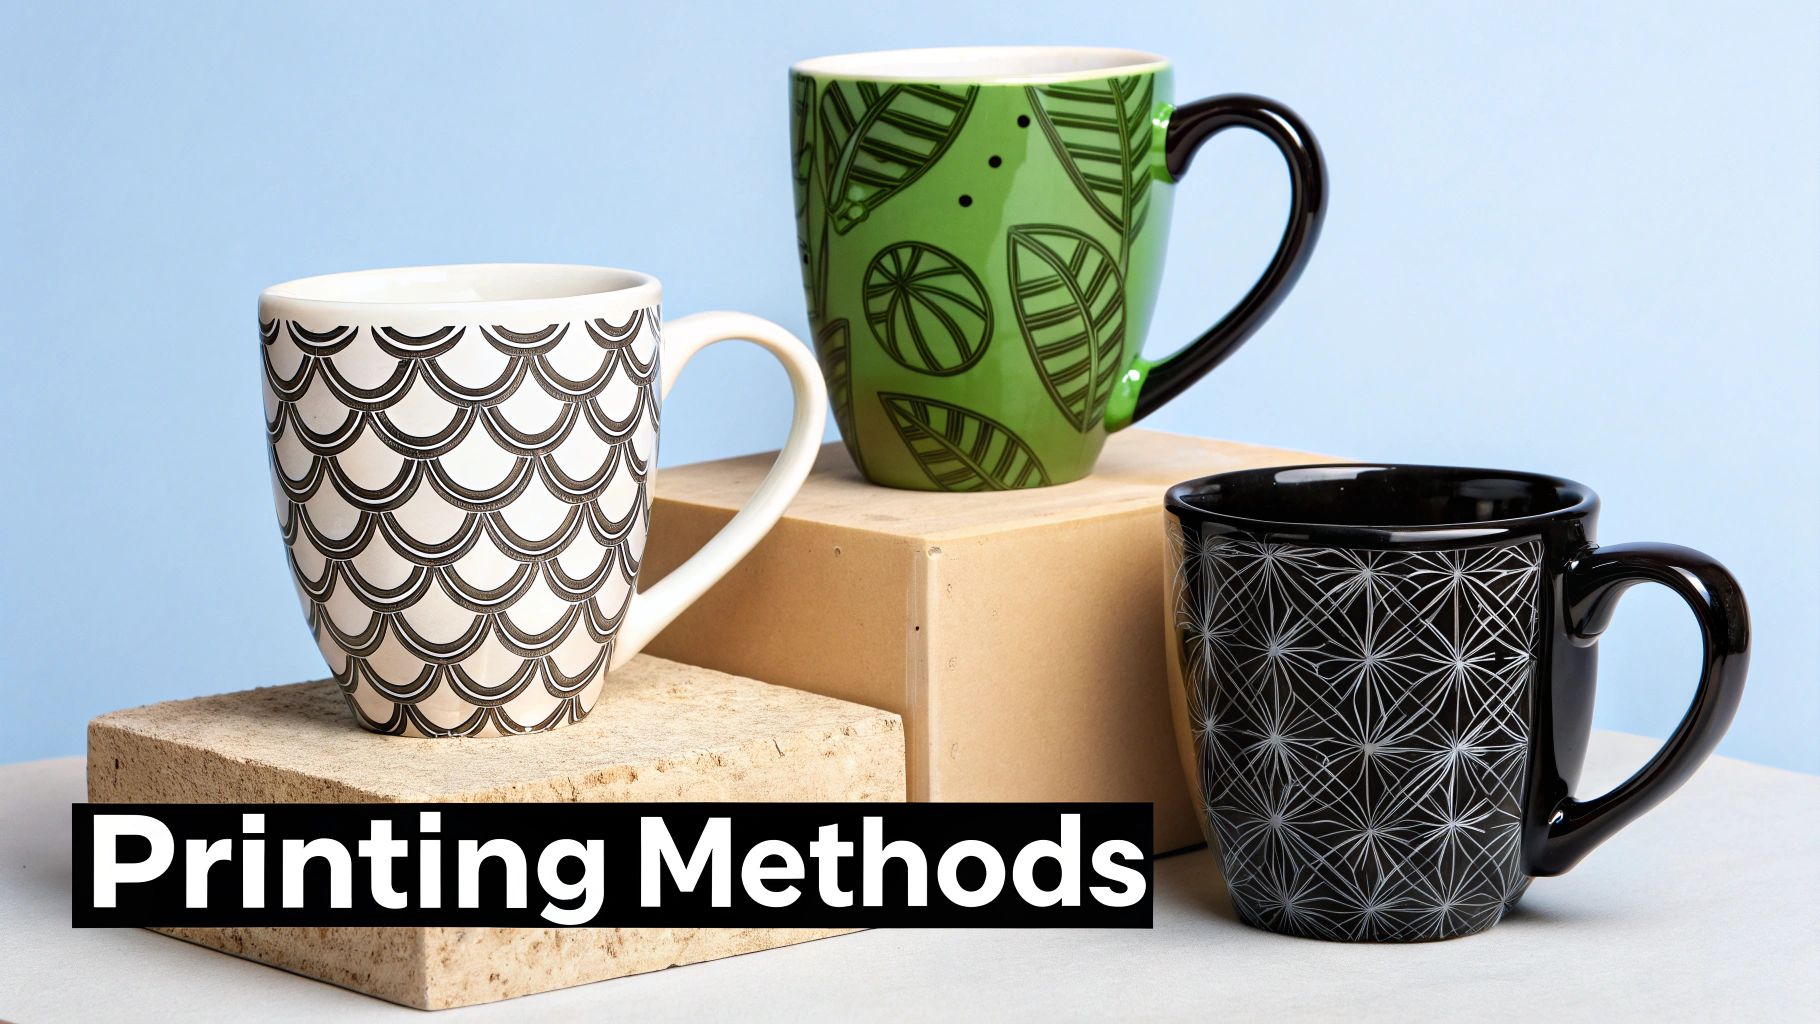
To kick things off, it’s really helpful to understand the basic differences between the main printing methods. Your decision here will directly affect how your mugs look, feel, and ultimately, how much they cost. This guide will walk you through all the details, but first, here's a quick comparison to give you a snapshot of your options.
Quick Comparison of Mug Printing Techniques
Here’s a simple breakdown of the most common methods for printing logos on ceramic mugs. This table should help you quickly see which technique might be the best fit for your project's goals and budget.
| Printing Method | Best For | Durability | Cost Per Unit |
|---|---|---|---|
| Dye Sublimation | Full-colour photos and complex, vibrant designs. | Excellent; dishwasher and microwave safe. | Moderate |
| Screen Printing | Simple, one or two-colour logos in large batches. | Good; durable but can fade over time with heavy use. | Low (for bulk orders) |
| Ceramic Decals | Premium, crisp logos with high durability needs. | Highest; permanently fired into the glaze. | High |
As you can see, there's no single "best" method—it's all about matching the printing technique to your specific needs. Whether you prioritise vibrant colour, cost savings on a large run, or absolute permanence, there's a solution that will work for you.
Choosing the Right Printing Method for Your Logo
Getting your logo onto a ceramic mug seems simple, but picking the right printing method is probably the most crucial decision you'll make. It’s the difference between a mug that looks fantastic and lasts for years, and one that just feels… cheap. Your choice really boils down to three things: the complexity of your logo, how many mugs you need, and what you're willing to spend.
Let's walk through the three main ways to get this done, so you can figure out which one makes the most sense for you.
Dye Sublimation for Vibrant Full-Colour Designs
If your logo is full of colour, gradients, or even a photograph, then dye sublimation is your best bet. This isn't your typical printing where ink sits on the surface. Instead, it uses heat to turn special inks into a gas, which then bonds directly with the mug's special polymer coating.
What you get is a perfectly smooth, seamless finish. The design literally becomes part of the mug itself. This means it won’t crack, peel, or fade away after a few trips through the dishwasher. It’s completely microwave and dishwasher safe. A quality print like this can really make your brand pop.

As you can see, a crisp, professionally printed mug does more than just hold coffee—it puts your brand front and centre.
- Here’s a real-world example: Imagine a local café wants to sell mugs featuring a colourful, artistic photo of their storefront. They only need about 50 mugs to start. Sublimation is perfect here. It can handle the complex, full-colour image beautifully, and it's economical for smaller batches.
Screen Printing for Cost-Effective Bulk Orders
For simpler logos and larger orders, you can't go past the classic screen printing method. I've used this for countless big corporate jobs. The process involves pushing ink through a fine mesh screen—like a stencil—directly onto the mug. Each colour in your logo needs its own separate screen.
Because there's a bit of setup involved, screen printing becomes incredibly cheap per mug when you're ordering in bulk. It's the go-to for bold, clean designs with just one or two solid colours.
- Think about this scenario: A large company needs 1,000 mugs for a trade show giveaway. Their logo is a simple, one-colour design. Screen printing is the obvious choice. The cost per unit will be far lower than any other method, which is a lifesaver for big-budget campaigns.
My two cents: If your logo has just a few distinct colours and you need hundreds (or thousands) of mugs, screen printing delivers a fantastic, durable finish without blowing your budget. It’s a workhorse method for a reason.
Ceramic Decals for Premium Durability
When you need a design that is absolutely bulletproof and looks incredibly sharp, kiln-fired ceramic decals are the top-tier option. This is a more involved technique. First, your logo is printed onto special decal paper. This decal is then carefully applied to the mug by hand.
Next, the mug goes into a kiln and gets fired at ridiculously high temperatures. This heat permanently fuses the decal into the mug's glaze, making the design exceptionally durable and part of the ceramic. It’s the most resilient print you can get. While it costs more, the premium result is often worth it, especially when paired with other high-end promotional items like a customised soft-touch pen with a stylus.
- Picture this: A luxury hotel wants branded mugs for its suites. The mugs need to survive hundreds of cycles in a commercial dishwasher without a hint of fading or wear. Kiln-fired decals are the only way to go to guarantee that level of durability and premium feel.
Getting Your Logo Ready for a Flawless Mug Print
A brilliant print on a ceramic mug doesn't just happen at the printer. It all starts with a high-quality, properly prepared design file. Getting this step right is the single best thing you can do to avoid common, costly mistakes before they even have a chance to happen.
Think of your design file as the blueprint for your mug. A shaky, poorly drawn blueprint will always lead to a wonky final product, no matter how good the builder—or in this case, the printer—might be.
Start with a Vector File for Ultimate Sharpness
Whenever you can, you absolutely must use a vector file for your logo. The most common formats you'll see are .AI (from Adobe Illustrator), .EPS, and .SVG.
Unlike a standard image file like a JPEG or PNG, which is just a grid of pixels, a vector file uses maths to draw lines and shapes. This means you can scale a vector logo to any size—from a tiny detail on a pen to a giant billboard—and it will never lose its sharpness or look blurry. If you try to blow up a pixel-based image, you'll see it turn into a jagged, pixelated mess. It's not a professional look.
If you don't have a vector version of your logo on hand, it's well worth the effort to get in touch with your original designer. It’s a foundational asset for any kind of branding work you'll do, not just for mugs.
Get Your Colours Right from the Start
Colour is another area where a little bit of prep work makes all the difference. The way colours look on your screen is completely different from how they're produced in print, and using the wrong colour mode can lead to some seriously disappointing results.
There are two main colour systems you need to understand for printing logos on mugs:
- Pantone Matching System (PMS): This is the undisputed gold standard for screen printing. PMS uses specific, pre-mixed ink formulas to guarantee your brand’s colours are perfectly consistent, every single time. If your brand has a signature "Coke Red" or "Cadbury Purple," you must provide the PMS code to get it right.
- CMYK (Cyan, Magenta, Yellow, Black): This is the system used for full-colour digital printing, like dye sublimation. It works by mixing these four colours to create a huge spectrum of shades. It’s fantastic for photos and complex, multi-coloured designs, but it can’t match a specific brand colour with the same precision as PMS.
Providing the correct colour codes is non-negotiable for brand consistency. Don't just eyeball it on your monitor; your screen's calibration can be wildly misleading. Always check your official brand style guide for the proper PMS or CMYK values.
Final Checks for a Perfect File
Before you hit "send" on that design file, run through this quick checklist. It can save you from a world of frustration and catch any last-minute issues that could derail your whole project.
First, convert all your text to outlines (sometimes called 'curves'). This simple action turns your font into a vector shape. Why does this matter? It means the printer doesn't need to have your specific font installed on their computer. If you forget this step, their system might swap your font for a default one, completely changing the look of your design.
Second, if you have no choice but to use a standard raster image (like a JPEG), make sure it has a resolution of at least 300 DPI (dots per inch) at the final print size. Anything less will almost certainly look blurry or pixelated when printed.
Finally, always respect the "printable area" of the mug. Most suppliers will give you a template that shows the safe zone for printing. If you place your logo outside this area, it could get cut off or warped as it wraps around the mug's curve. This level of precision isn't just for mugs; you can see how similar design rules apply to other items, like a full-colour paragon pen, where every millimetre counts.
Selecting the Perfect Mug and Supplier
You can have the most brilliant logo design, but if the mug itself feels cheap or looks clumsy, the whole effort falls flat. The physical product your customer holds is every bit as important as the artwork on it. Think of the mug as the canvas for your brand—getting it right is the first real step to a fantastic result.
The shape of the mug says a lot. A classic C-handle mug is a safe bet; it’s familiar, comfortable, and perfect for a corporate giveaway. But if you’re a trendy cafe or a modern design agency, a sleeker bistro-style mug might capture your vibe much better. The shape itself is part of your brand's story.
Getting a Feel for Mug Quality and Materials
It’s easy to think all ceramic mugs are the same, but they absolutely are not. The quality, specifically the grade of the ceramic and its coating, will make or break your final print. This is especially critical for sublimation printing, which relies on a special polymer coating for the ink to properly fuse with the surface. A low-quality mug with a patchy coating will give you a blotchy, faded design every time.
When you're talking to suppliers, ask them directly about the ceramic grade. A higher grade means a smoother surface to print on and a mug that will stand up to daily use. Don't be shy about getting into the nitty-gritty details.
Here in Australia, we're seeing a big push for quality, personalised items. Industry trends show a clear move towards sustainability in the ceramic mug world, with a focus on eco-friendly materials. Choosing a mug that aligns with this can do wonders for your brand’s image.
How to Find and Vet the Right Supplier
This part is crucial. Finding a partner you can trust is about more than just getting a good price. A great supplier will offer quality products, yes, but they'll also guide you through the process. Rushing this decision is a recipe for disaster—think missed deadlines, shoddy work, and a blown budget.
Here’s what I always do when checking out a new supplier:
- Get Your Hands on a Sample: I can't stress this enough. Never, ever place a bulk order without seeing the product first. A sample lets you feel the weight, check the print quality, and see how the colours look in person.
- Check Their Reputation: Look for reviews and testimonials from other businesses. What’s the word on their communication, turnaround times, and overall quality? Consistent positive feedback is a very good sign.
- Lock Down the Timeline: Be upfront about your deadline. Get a firm confirmation that they can deliver on time, including shipping, before you sign anything.
A good supplier relationship is a partnership. They should be just as invested in making your project a success as you are. If they're hesitant to send samples or can't answer your questions clearly, that’s a massive red flag.
It's also a smart move to find a supplier who thinks about the bigger picture. Someone who can provide your custom mugs alongside other coordinated promotional items, like an elegant soft-touch gel pen, can help you build a much stronger brand package. It simplifies your life and keeps your branding looking sharp and consistent.
Common Mug Printing Mistakes and How to Sidestep Them
Even with the best of intentions, a few simple slip-ups can turn an exciting mug project into a costly headache. I've seen it happen time and again. Knowing what these common errors are in logo printing on ceramic mugs is the single best way to avoid them, saving yourself a whole lot of time and money in the process.
One of the most frequent (and frustrating) issues is poor colour matching. You sign off on a digital proof where your logo looks spot-on, but the finished mug arrives with colours that are just… off. That vibrant brand red looks a bit dull, or the navy blue is almost black. This almost always happens when specific colour codes aren't provided.
Don’t just rely on how colours look on your computer screen. To guarantee your brand colours are nailed perfectly, especially with methods like screen printing, you have to give your printer the exact Pantone (PMS) colour codes from your official brand guide. It's the only way to be sure.
Another classic mistake is getting the logo placement wrong. A logo printed too close to the handle is awkward to see, while one that’s too low just looks like an afterthought. You might think the printer will know best, but "centred" can mean different things to different people. It's always better to provide a clear mock-up showing exactly where you want that logo to sit.
Durability Issues and Design File Disasters
Have you ever ordered a batch of mugs, only to find the print starts fading or peeling after just a few runs through the dishwasher? That’s a tell-tale sign the wrong printing method was used for how the mug was intended to be used.
A simple screen print might look great initially, but it won't stand up to daily scrubbing.
- For daily use: You really need to opt for sublimation or kiln-fired decals. These methods actually embed the design into the mug's surface, making it incredibly durable and properly dishwasher-safe.
- For promotional events: A standard screen print could be fine if the mugs are for occasional use, but it’s important to understand its limitations.
The quality of your print is also directly linked to the quality of the design file you provide. A blurry, pixelated logo is almost always the result of using a low-resolution image file, like a JPEG you pulled from a website. For a crisp, professional finish, a vector file (formats like .AI or .EPS) is non-negotiable. It can be scaled to any size without losing a drop of quality.
Avoiding Those Last-Minute Surprises
Finally, failing to order a physical sample is a gamble you just shouldn't take. A digital proof on a screen can't tell you how the mug actually feels in your hand, its true weight, or how the colours look under different lighting. A physical sample is your last, best chance to catch any issues before you commit to a full production run.
This kind of attention to detail should apply to all your promotional materials. Just as you'd proof a mug, you need to ensure a consistent feel across other branded items. For example, the premium finish on a stylish soft-touch diamond stylus pen should complement the quality of your mugs to create a cohesive and professional brand experience.
By being proactive and crystal clear with your instructions, you can easily sidestep these common pitfalls and get a final product you’re truly proud to put your name on.
Your Mug Printing Questions Answered
When you're looking to get your logo printed on ceramic mugs, it’s completely normal to have a few questions pop up. Getting straight answers is the first step to making sure the final product is something you’ll be truly happy with. Let's walk through some of the most common things people ask us.
One of the first concerns is always durability. You're investing in these mugs, so you want them to look fantastic for a long, long time, not just the first time they go through the wash.
What Is the Most Durable Printing Method for Mugs?
For a print that truly lasts, you really have two standout choices: dye sublimation and kiln-fired decals. Both of these methods essentially fuse the design into the mug, making it incredibly resistant to fading, scratching, and countless trips through the dishwasher.
Sublimation turns ink into gas that embeds into the mug's special coating, while kiln-firing bakes the decal right into the ceramic glaze, making it a permanent feature. If you expect these mugs to be used every day, these are the methods we stand by. Standard screen printing, while a solid option for large-scale orders, just can't compete on sheer permanence.
How Much Does It Cost to Print Logos on Mugs?
There’s no single price tag for printing on mugs. The final cost really comes down to a few key variables that can swing the price one way or the other. Getting a handle on these will help you set a realistic budget.
- Order Quantity: This is a big one. The more mugs you order, the lower your cost per mug will be. It’s a classic economy of scale, especially with methods like screen printing where the initial setup cost is spread across the entire run.
- Number of Colours: A simple, one-colour logo is always going to be the most budget-friendly option. Every extra colour you add to the design typically means a separate screen or process, which adds to the cost.
- Printing Technique: The method matters. Premium techniques like sublimation and kiln-firing cost more than basic screen printing because the process is more involved and labour-intensive.
The smartest way to manage your budget is to match your design to your order size. For a big giveaway at a trade show, a clean, one-colour logo makes perfect sense. For a high-end gift for your best clients, investing in a full-colour, super-durable print is absolutely worth it.
Can I Print a Photograph on a Mug?
You certainly can! If your goal is to print a detailed photograph or a design with lots of complex colours and gradients, dye sublimation is your best friend. It’s the go-to technique for creating photorealistic images with incredible clarity and beautiful, vibrant colours.
Just one piece of advice: for the best possible outcome, start with a high-quality image file. A sharp, clear photo with a resolution of at least 300 DPI (dots per inch) is what you need. This ensures your final printed mug looks professional and crisp, not blurry or pixelated.
If you have other questions about the nuts and bolts of the process, feel free to dive into our detailed frequently asked questions section for more answers.


0 comments